If you click on a link and make a purchase we may receive a small commission. Read our editorial policy.
Shadow and Bone: How to make your own Kefta uniform and join the Grishaverse
Create your own Grishaverse cosplay using this Kefta tutorial!

With a new season of Shadow and Bone out now on Netflix, it's time to dive back into the Grishaverse - or get your feet wet for the first time.
There's already a growing Grishaverse merch line (which you can see here!), but if you're like many of us you want to take the next step and look like some of the characters from Leigh Bardugo's univrse.
Naturally, as a big fantasy show is on our minds again, the cosplayers are dusting off their sewing machines, and I’m here to help you make your own fantastical ‘Kefta’!
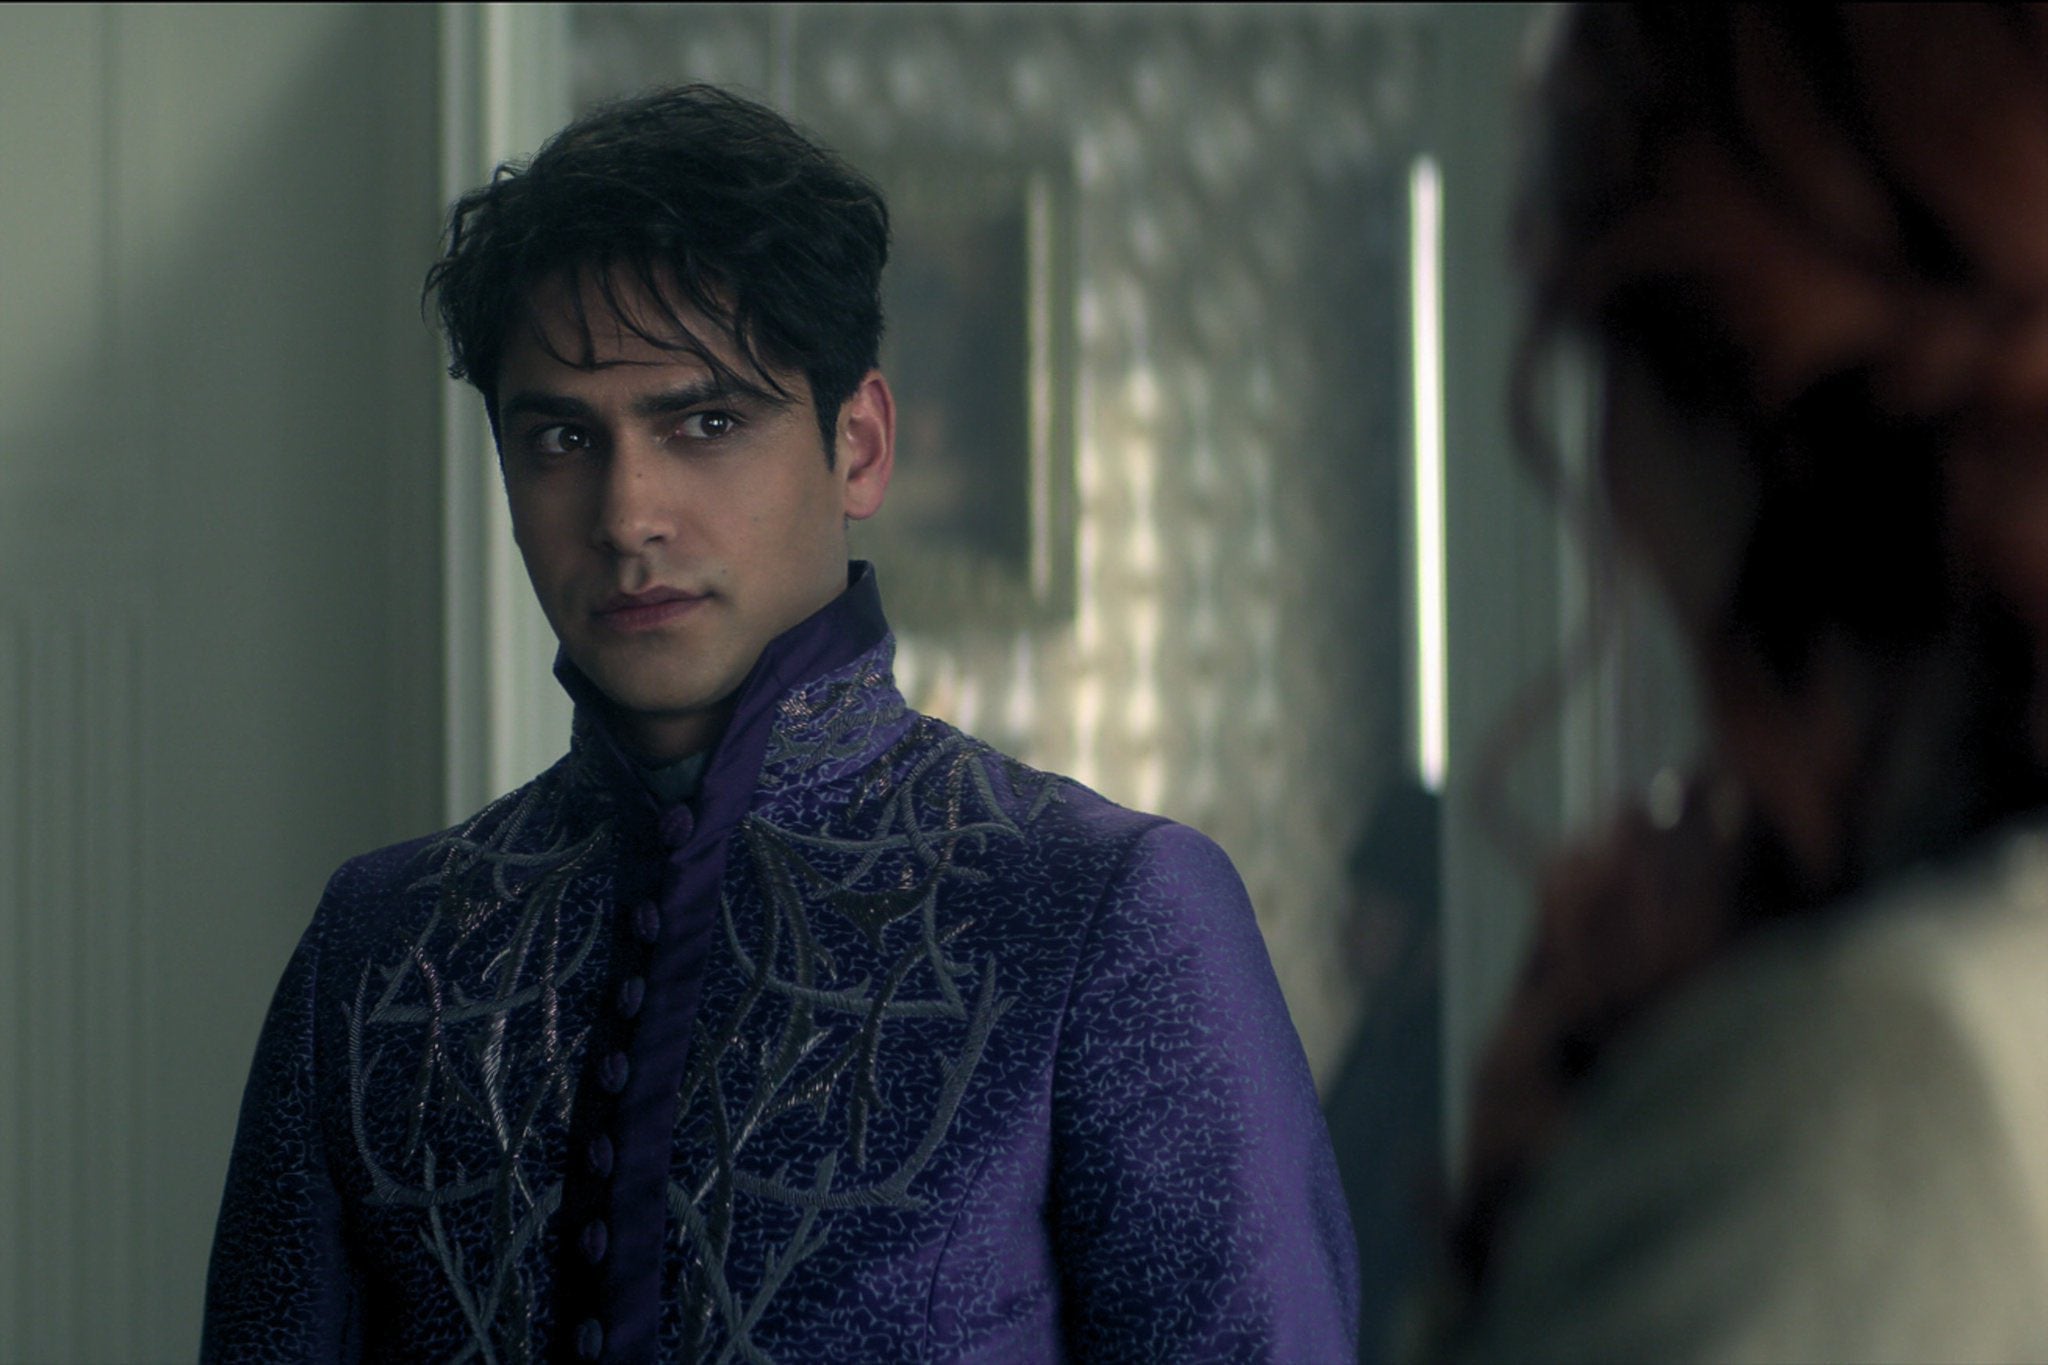
For the uninitiated, Kefta’s are the military uniforms worn by the ‘Grisha’, the magically powered soldiers in the ‘Ravkan’ army. Not your usual camo and tactical vests, the Keftas are described as luxuriously embroidered overcoats, with the fabric and embroidery colors denoting your rank and power class.

Emmy nominated Costume Designer Wendy Partridge is the mastermind behind translating these outfits for the screen, and she’s certainly done her job. Blending inspirations from Eastern European, Asian and Military ceremonial dress, she’s created an opulent world, with every detailed costume choice transporting you into the story. You can view her team’s inspiration for all the show costumes by browsing their Pinterest page.
I’m going to cover two ways of making you own Kefta. Both will require some effort, as these are detailed costumes, but it’s certainly doable by beginners.
- Beginners - Buying a base garment and using premade embroidery appliques.
- Advanced - Creating a garment from scratch and using screen accurate traditional embroidery techniques.
Beginners
Firstly if you’re not looking to spend weeks hand embroidering, you might take the probably wiser route and use premade embroidery appliques for you Kefta instead of hand crafting the masses of embroidery they’ve decided to do.
For a base coat, if you don’t wish to make your own it shouldn't be too hard to find a plain long coat at your nearest thrift store! Luckily all the Keftas are solid colors, so if you can’t find the shade you need, fabric dye is always an option. There are also plenty of options online for coats to be adapted - I’m a big fan of this one, as it has such a vast shade range that covers ALL the different characters’ colors, and would only need some quick modifications with a pair of scissors to cut down the lapel size to match the base coats in the show.
For the embroidery, once you’ve purchased your choice of fabric, all you would need to do is cut out the embroidery (coat the back in some pva glue and let dry to be extra cautious about the stitches not coming out!) and attach it onto the coat. You could do this by sewing machine if you’re doing it on flat fabric pieces, or hand sew (my fave - I like to just slip stitch in a strong thread matching the fabric, along the edges of the piece) and in a pinch you could even glue it with fabric glue!
I wouldn’t recommend this as the hold wouldn't be very strong for heavy wear, but if you’re not too worried about accuracy on longevity then go ahead! If the embroidery you like isn’t available in the color you need, it’s definitely an option to buy a white/pale color and paint the embroidery with some colored metallic fabric paint.
Options for embroidery appliques:
My favorites:
Some other options:
- Gold Vines Corded
- White Sequin Fabric With Trees
- Gold Sequins
- Frances Gold Vines and Leaves
- Peach Sequin Embroidery
- Flower Lace
- Gold Leaf Vine
Advanced
Now for the masochists who wish to make everything from scratch.
First you’ll need a coat! The fabric of the coats in the show is a textured jacquard, with a small, crackle texture woven in. It’s very beautiful, however after about a month of intense searching I am yet to find the real one, so I can only presume they had the fabric custom manufactured for the show. But don’t fret! There are plenty of alternative options.
If you’re not worried about having the pattern/you’re working with a lower budget, a velvet or other plain thicker fabric would work great!
If you’re wanting something with a similar texture/pattern to the show, here are some great options (all of them I personally have received samples of, and approve):
- My Fabrics
- TerrysFabrics
- CurtainFabricStore
- Abakhan
- FabricUK
- MoodFabrics 1
- MoodFabrics 2
- MoodFabrics 3
As for sewing patterns, the coats in the show are pretty straight up and down, without any Godets or any skirt flare. This means the designs are nicely unisex! Shaping is achieved with a wide belt over the top of the coat, with the army’s sigil belt buckle featured on the front.
There are many sewing patterns you could use for this look, here are my two favorites I’ve found:
Now onto the embroidery
ALL of the Kefta embroidery in the show is Goldwork embroidery. Goldwork embroidery is a super luxe, historical embroidery technique using metal threads and wires sewn down onto fabric. It’s seen on Military uniforms in lots of different countries, as well as indian garments (India contains a lot of specialist goldwork embroidery houses, which is where I presume they outsourced the Kefta embroidery for, because there’s no way an American studio did that amount they needed for the show).
Wendy’s designs beautifully show inspiration to the different characters’ powers within the swirls of embroidery - e.g. Zoya’s showcases swirling silver tornadoes, Alina’s is a bright burst of golden sunlight, and General Kirigan’s is inky black crawling vines, infecting the jacket, while the intricate designs are still paying homage to Historical Military uniform embroidery techniques, just with a touch of fantasy.
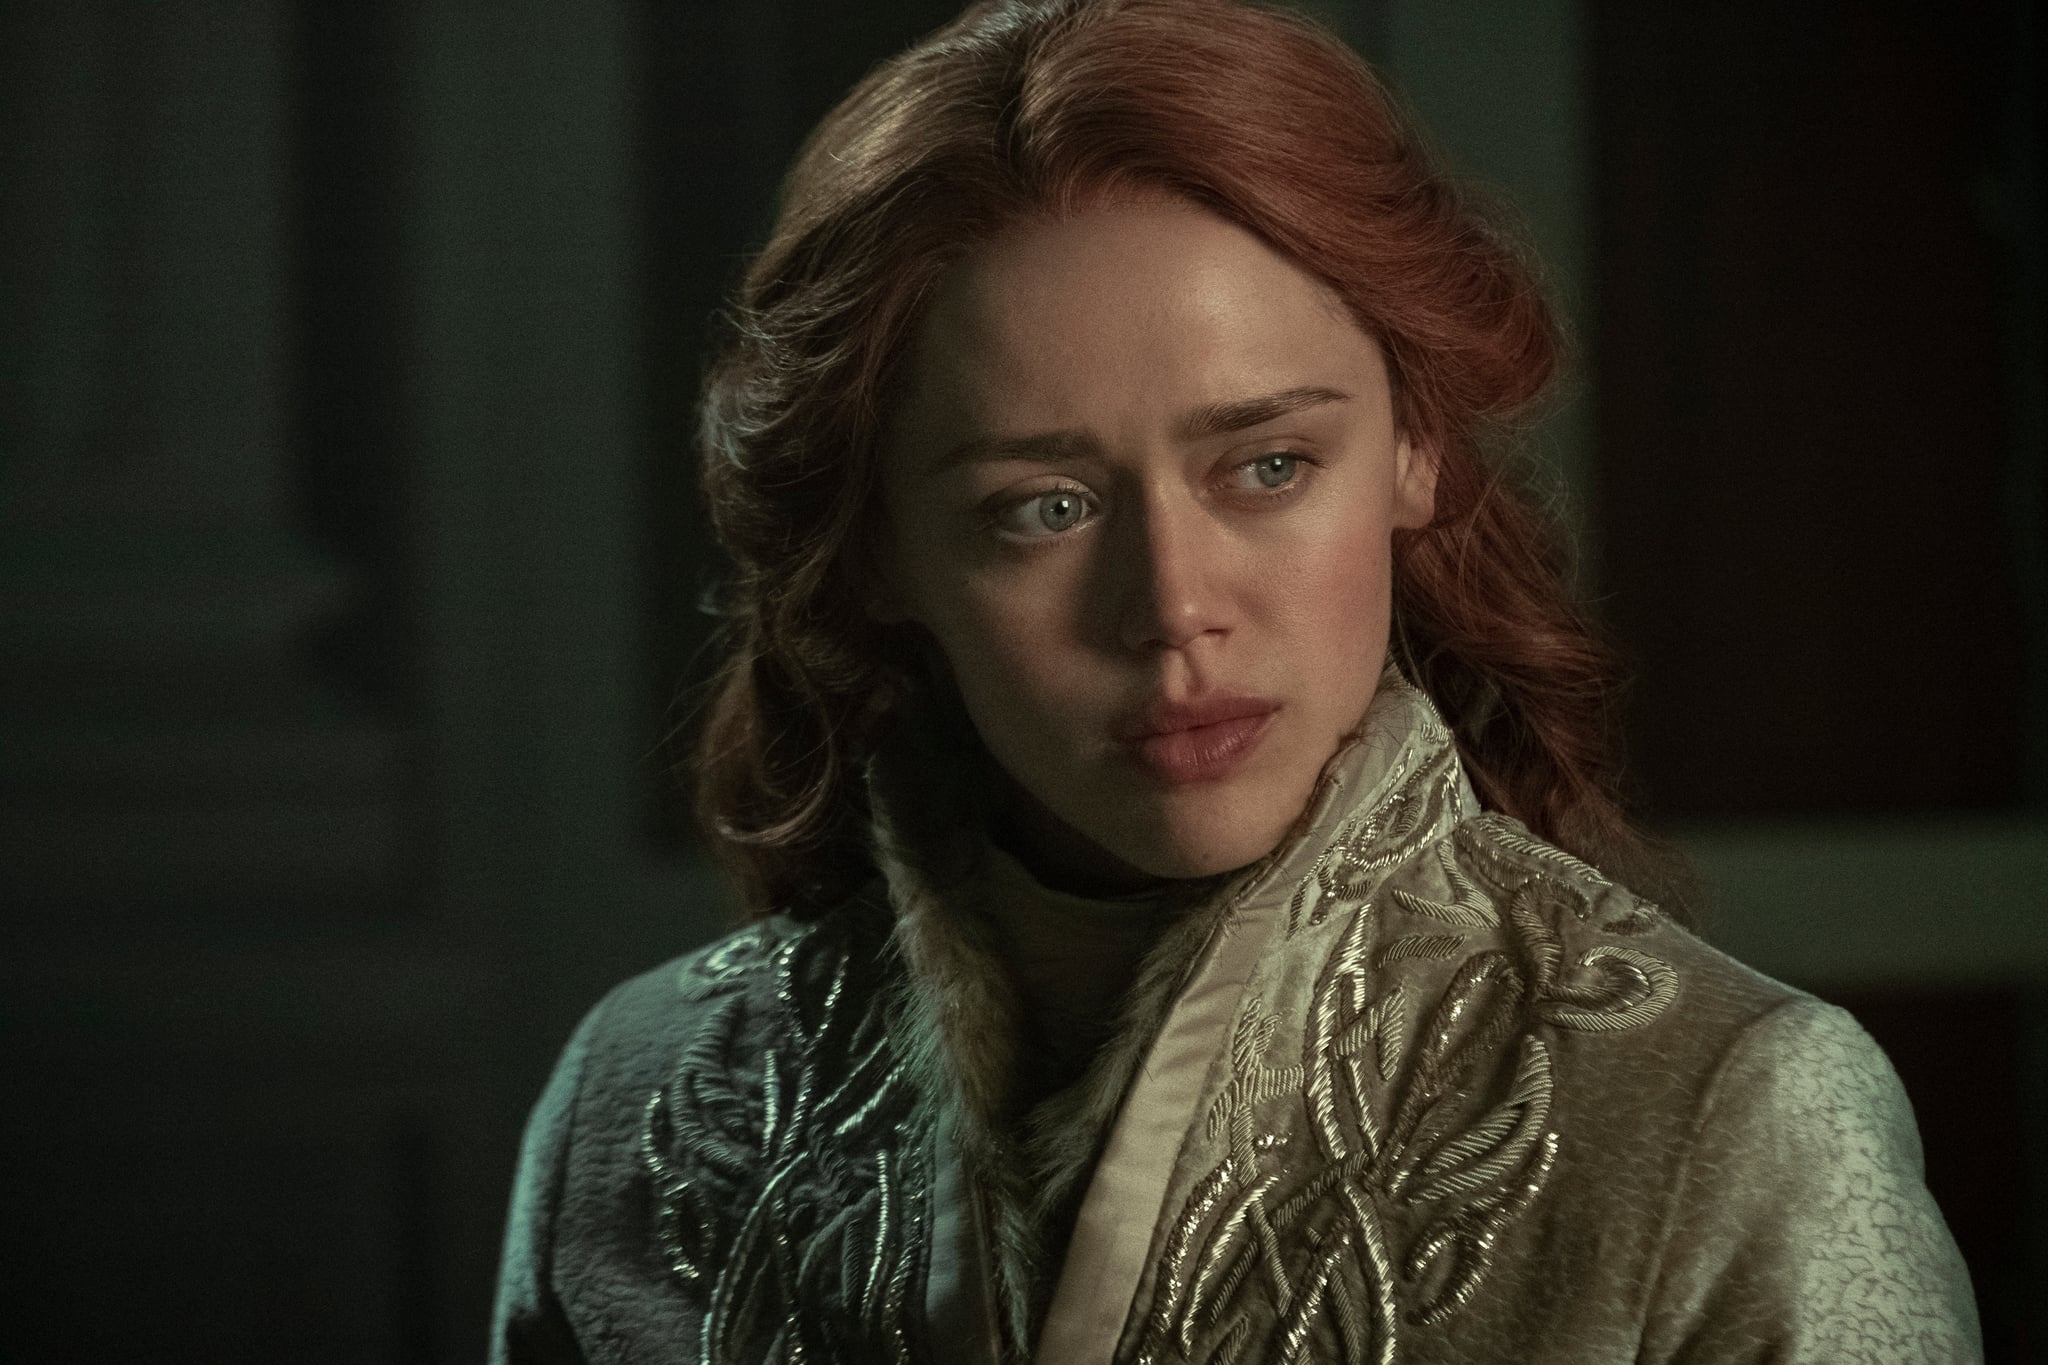
Goldwork embroidery can be quite an inaccessible craft to learn - the techniques are old and most places to learn cost hundreds of pounds in practical courses. Keep your eyes peeled on the Cosplay Central website for an in depth tutorial on goldwork embroidery (including every step you’ll need to take for the Kefta embroidery!) but for now, here’s a brief overview:
There are a few different types of goldwork embroidery, bullion wire, japanese metal threads, broad plate (which is what you can see on Claire’s Wedding Dress in Outlander!) but what we need to focus on here is bullion wire.
There are a few types of wires:
Smooth Purl - Shiny bullion wire

Rough Purl - Matte Metallic bullion wire

Pearl Purl - This looks like a tiny row of round beads. We don’t need to use this on this costume.

Check wire - This has a super spiky… crunchy texture due to the wires being wound around a triangle shape. Again, not used here but it’s excellent for texture on other pieces!

For the Keftas, they mix together smooth and rough purl wires. Be careful when mapping out your embroidery to get the right ones in the right places! On the references, if it looks metallic and reflective, it's the smooth. If it’s more matte, it's the rough.
SUPPLIES:
For the wires, my favorite places to purchase from are Sarah Homfray (ships worldwide!) and Golden Hinde.For people not in Europe I'm sure there are better places nearer to you, dear reader, which can be found with a quick ‘goldwork embroidery supplies’ google.
However, for the amount that’s on the Keftas, you’re going to need to buy in bulk. When you buy from the above shops, it comes in small baggies of 2m of wire. This will not go very far, and would be ridiculously expensive to buy the amount you would need for these Keftas. SO these are my favorite places to buy in bulk from India:
I bought 50 yards/100grams of each color I needed for my upcoming Kefta (one 50yd packet of smooth purl, one 50yd packet of rough purl).If you’re doing Alina or The Darkling especially, I would double that amount, as they have a vast amount more embroidery than the other Grisha.
These shops all have super amazing customer service, and the shipping to the UK from the Indian stores was surprisingly fast!
So you have your wires, now what?
Embroidery prep
Almost ready to go! Just a few more supplies needed.
You have two options when it comes to costume embroidery: Embroider directly onto the garment fabric, or make an applique. I much prefer and will always recommend the latter, as its way more portable, it's not the end of the world if you make a mistake and need to go back, it's more secure in the long run as a costume (you can see the wires and stitches breaking on some of the stills from Shadow and Bone because they’ve embroidered directly onto the fabric, and the movement of the actors has been breaking the embroidery) and finally you can sew the appliques on before adding your coat lining fabric, meaning you have a nice pretty inside to your garment without stitches showing.

To make appliques, my preferred method was borrowed from the Game of Thrones costume embroiderer Michele Carragher. Very much recommend checking out her work for costume embroidery inspiration!
I like to embroider onto Organza or Organdie if I want something stronger (like for this, because metal wires are heavy), but most of the time I use organza matching the garment fabric, as it's so transparent that even if there are sections slightly showing, it’ll be practically invisible after it’s sewn down! You can carefully cut out the pieces and stitch onto your garment! So much easier than embroidering directly onto the fabric, as you can move it around to position exactly where you want.
I buy my organza from Ebay but most fabric shops should have some! This is the sort you want. You DON'T want the weird plasticy iridescent crinkly type you can sometimes find. If you go for organdie, you want this sort of stuff.

Ok so you’re ready to sew. Well not quite. You can’t just do the metal wires flat on the surface of the fabric as the wires will damage the fabric and the thread if they’re at a right angle. You need some padding underneath to give it shape! You can use either felt fabric or string - string gets used to do super rounded raised shapes (not needed for the Kefta embroidery) but it's good to know for other work! Otherwise you can use felt. Now you could do it properly, and cut and sew down multiple layers of craft felt to gradually raise it, or if you’re lazy like me just get some thicker 4mm felt fabric.
FINALLY its sewing time.
This is just an absolute BASE quick tutorial of the technique - for the full start-to-finish tutorial, check out our Goldwork Embroidery Tutorial coming out next week!
What you’ll be doing is cutting little pieces of the wire, the width of the felt, threading it onto your needle like a bead, and sewing it down in parallel lines on top of the felt padding. To make things easier, before cutting anything, ever so slightly pull the wire a LITTLE bit to loosen it. This will help with the bending to shape, as if it’s slightly too long it’ll shrink down again to fit where you’re stitching. It’s basically a shiny, super tightly coiled spring.
And there we go! There’s a relatively quick overview of how to make both a beginner’s and an accurate Kefta from Shadow and Bone on Netflix. I can’t wait to see the various colorful Keftas the cosplay community makes!
Happy crafting!
The 10 best online Cosplay stores for your next big event.
Follow Popverse for upcoming event coverage and news
Find out how we conduct our review by reading our review policy
Let Popverse be your tour guide through the wilderness of pop culture
Sign in and let us help you find your new favorite thing.







Comments
Want to join the discussion? Please activate your account first.
Visit Reedpop ID if you need to resend the confirmation email.